The founder of iGeeksBlog, Dhvanesh, is an Apple aficionado, who cannot stand even a slight innuendo about Apple products. He dons the cap of editor-in-chief to make sure that articles match the quality standard before they are published.
Domain Name System or DNS is a basic configuration that works in the backend every time you connect your iPhone/iPad to the web. While it’s unique with every internet service provider, it can be customized or changed through various online mediums using services of Google, Cloudfare, and Open DNS. Let’s have a sneak into how you can change the DNS server on your iPhone and iPad.
 on i next to wi fi name then tap on configure dns in settings on iphone" width="1524" height="1078" />
This changed DNS will keep working even if you temporarily disconnect from this Wi-Fi network and reconnect. But, if you forget this network, it will erase the custom DNS too.
In case you use multiple Wi-Fi networks (like home, office, best friend’s house, etc.), and wish to use custom DNS everywhere, you will have to set this up for each network individually.
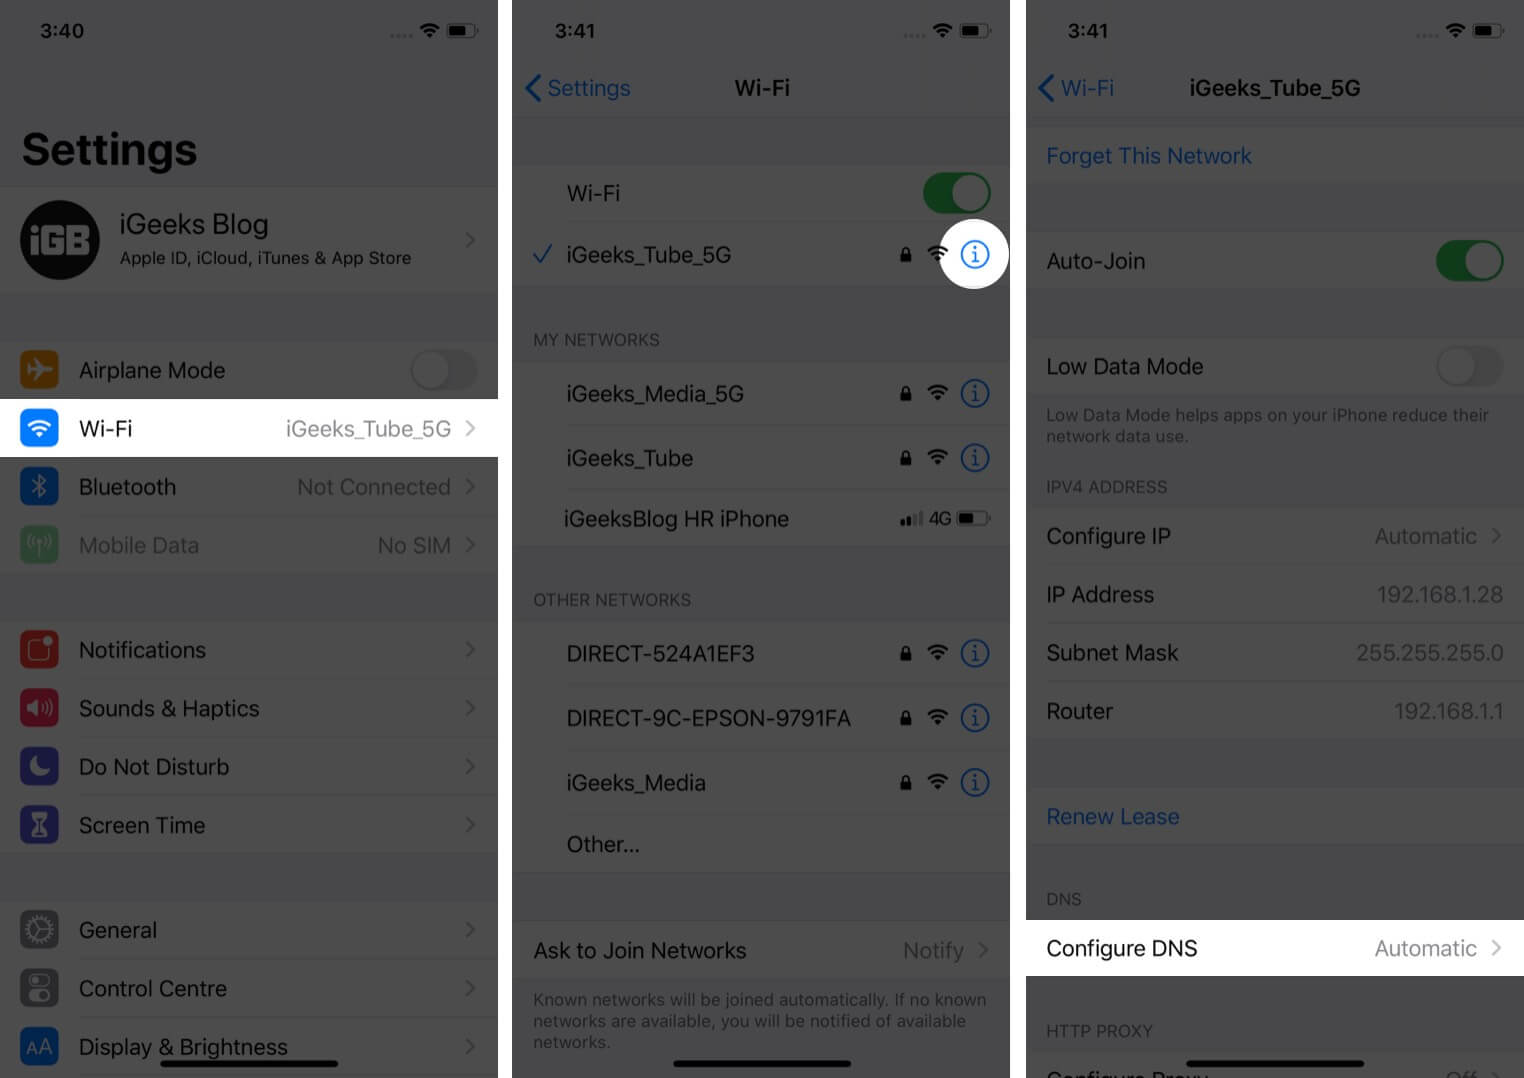
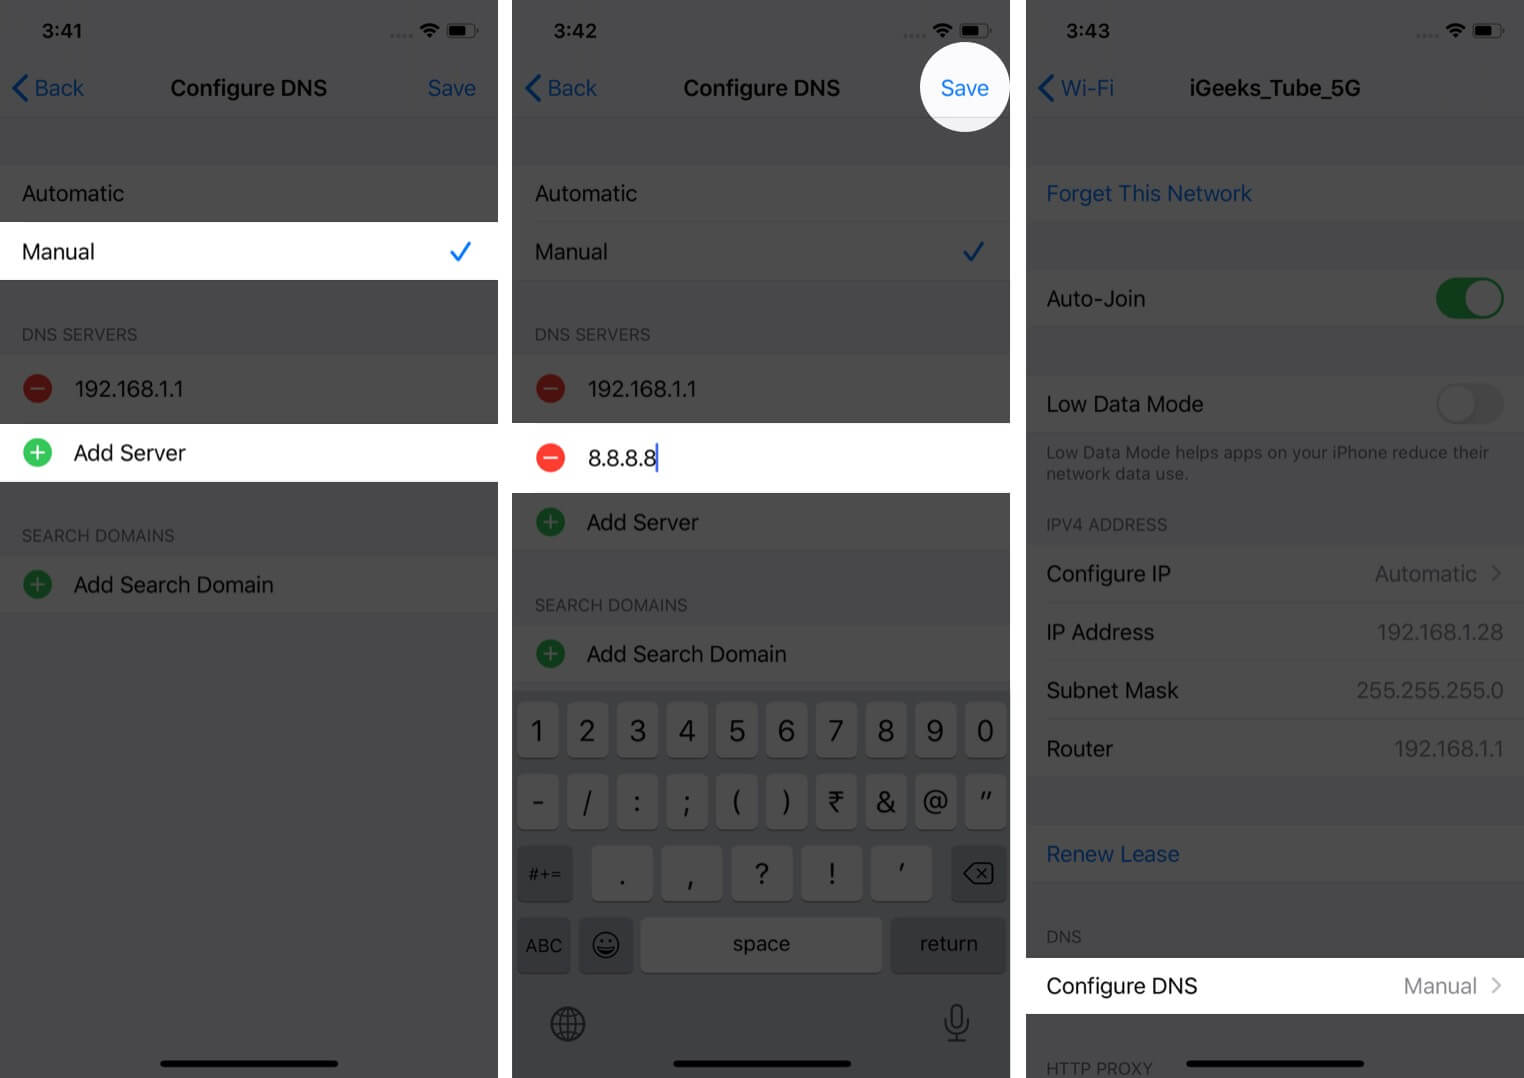
To do this, launch the Settings app → Wi-Fi → “i” next to a Wi-Fi name → Configure DNS. On the next screen, tap on Automatic. Finally, tap on Save.
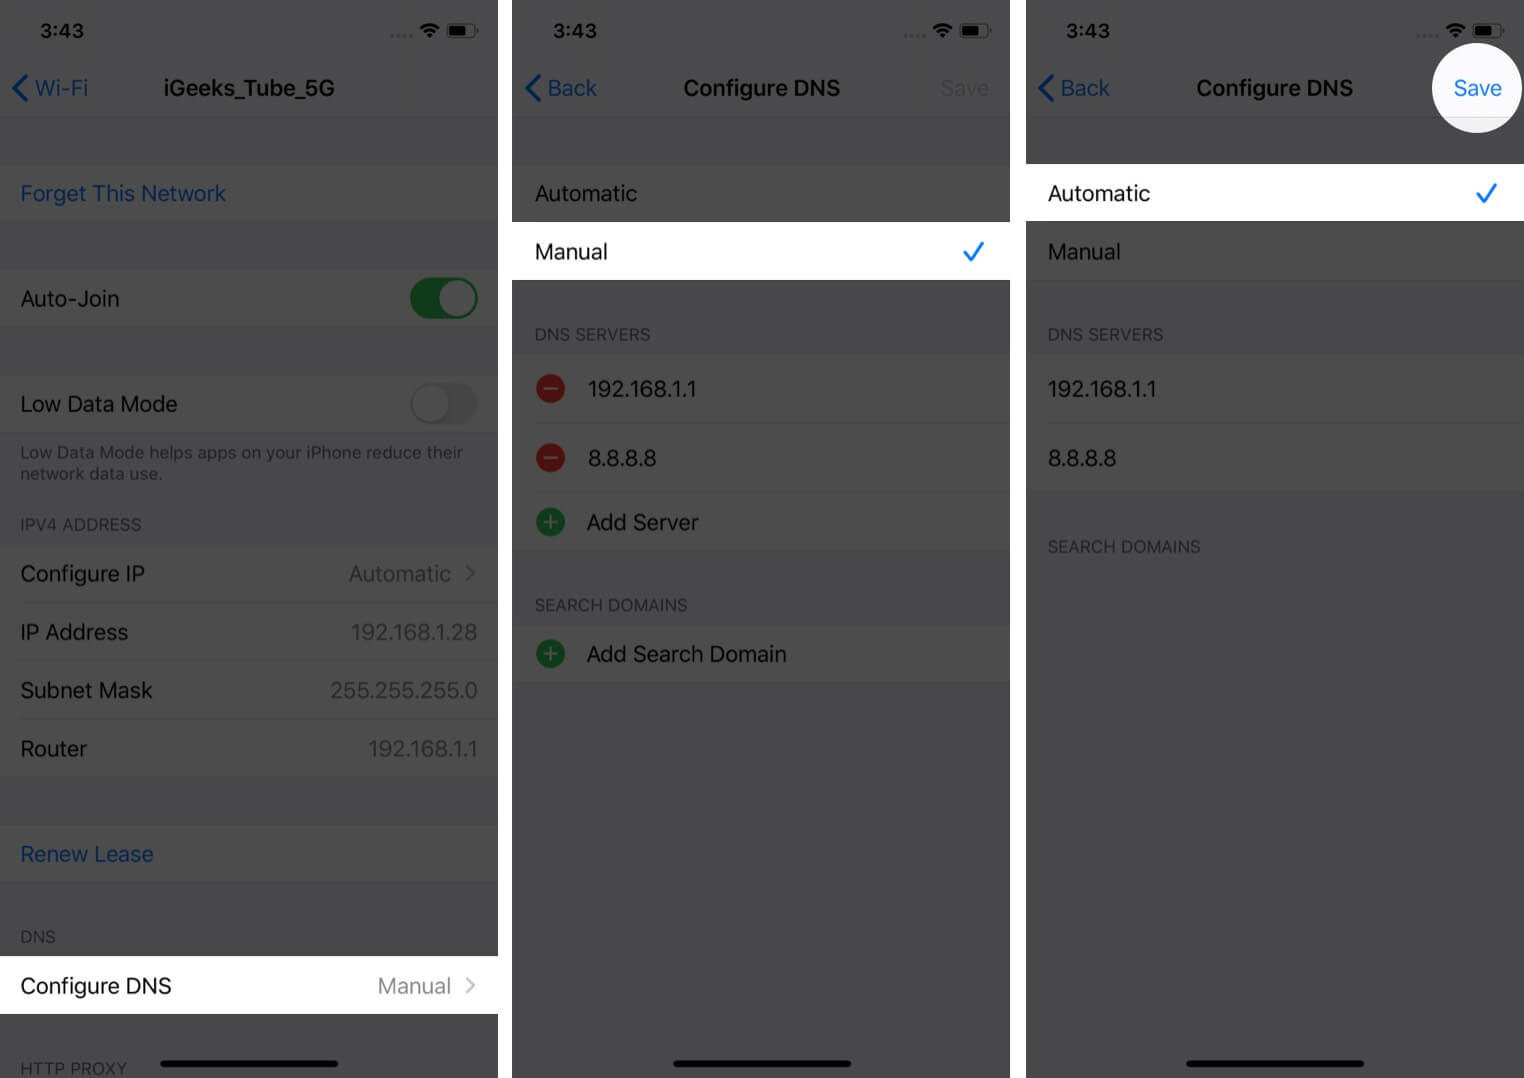
You are now using the default DNS set by your Wi-Fi provider.
iOS or iPadOS does not let you change DNS settings for cellular data. But you can use third-party apps like 1.1.1.1 by Cloudflare that let you change DNS.
Alternatively, if you use a VPN app, it uses its own server before connecting you with websites and services you are trying to access. This effectively bypasses your cellular data provider’s default DNS server.
Here are some of the most popular public DNS server address you can use on your devices.
| Provider | Primary DNS | Secondary DNS |
|---|---|---|
| Google’s Public DNS | 8.8.8.8 | 8.8.4.4 |
| Open DNS Server | 208.67.222.222 | 208.67.220.220 |
| Cloudflare DNS Server | 1.1.1.1 | 1.0.0.1 |
| CleanBrowsing | 185.228.168.9 | 185.228.169.9 |
Signing off…
This is how you can change DNS settings on your iPhone and iPad. Now that you know the basics, you can use this information to switch DNS on Mac as well. For this, launch System Preferences → Network → Wi-Fi → Advanced → DNS.
What are your thoughts on this? Were you able to successfully jump to a different DNS on your iOS or iPadOS device? Share your experience with the world in the comments section below.
READ NEXT:
The founder of iGeeksBlog, Dhvanesh, is an Apple aficionado, who cannot stand even a slight innuendo about Apple products. He dons the cap of editor-in-chief to make sure that articles match the quality standard before they are published.
Apple Ecosystem Content Strategist Technology Internet Marketing BloggingWant to read more like this?
Join 15,000+ Apple enthusiast to get the latest news and tips from iGeeksBlog+.
We won’t spam, and you will always be able to unsubscribe.